Knowledge Base Help Center
Login
-
Apple III
-
Hard Drives
-
General
- 3.5 external floppy drive teardown
- Apple II Color Matching - Paint & Filament
- Apple II new storage media options
- Apple II plus IC Chart
- Applesauce Project
- Convert PC Joysticks to Apple II
- How to fix an Apple joystick when the buttons stop working
- Installing a parallel CR2032 battery on a vintage Dallas-based No-Slot Clock
- PC to Apple II Joystick Adapter
- Recovering disks with AppleSauce
- Verify Apple II ROMs
-
Apple IIgs
-
Monitors
-
Floppy drives
-
Apple IIc
- Apple IIc international model codes
- Apple IIc known Clones
- Apple IIc MacEffects Keyboard Software
- Apple IIc ROM upgrade
- Apple IIc ROM Versions
- Apple IIc section at iFixit
- Apple IIc versions
- Apple IIc video options
- Apple IIc volume knob/potentiometer repair
- Cleaning and fixing 3.5 Floppy Drives Video
- Identifying and fixing defective RAM on Apple IIc ROM 255
- Opening an Apple //c Green Monitor
-
Apple IIe
-
Retrobrite
-
Clones
< All Topics
Print
Apple /// clock/calendar – kit installation
PostedSeptember 22, 2020
UpdatedSeptember 17, 2022
ByJorma
Apple 825-0737-A 
-Open and remove the top-case, installed cards, cables and whole motherboard.

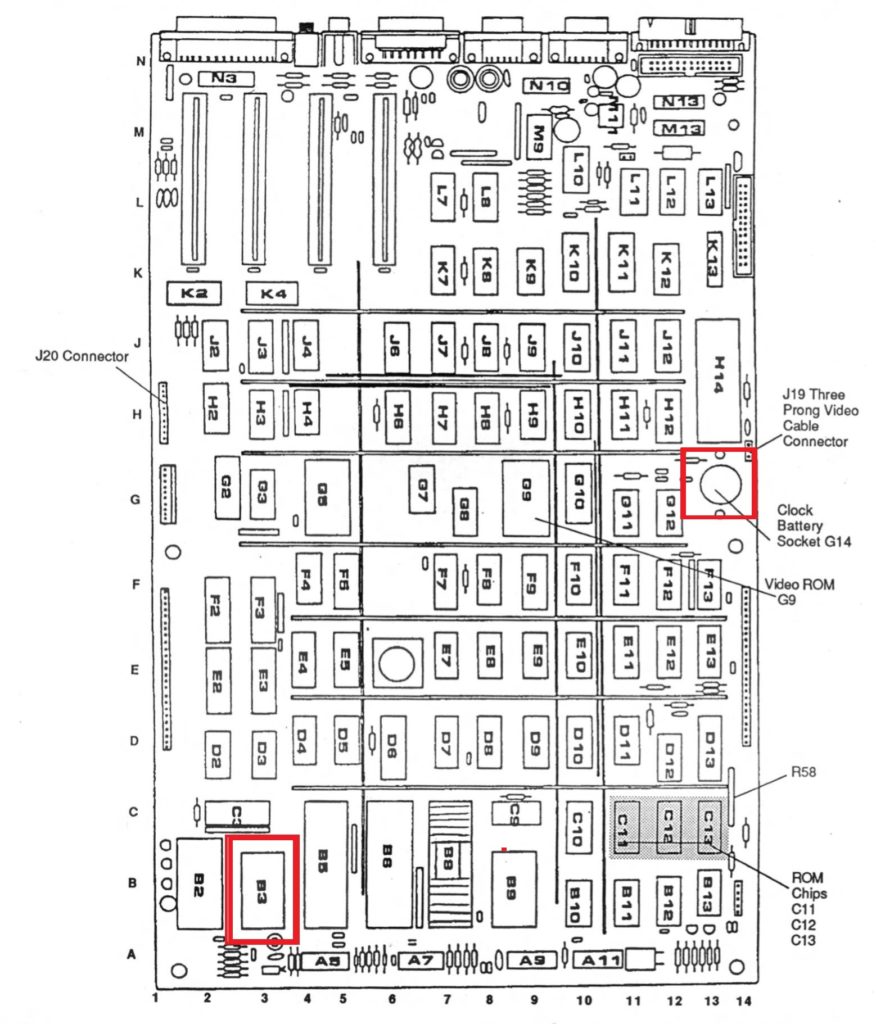
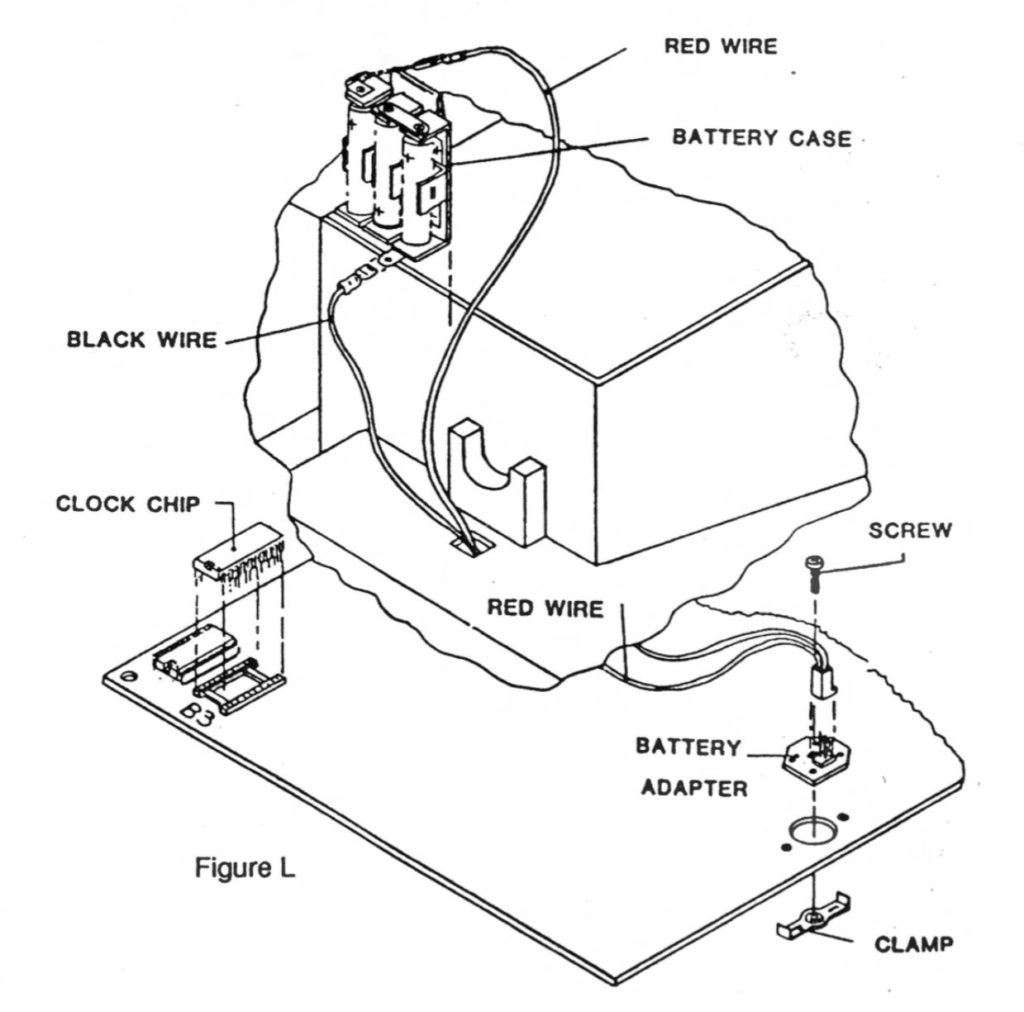
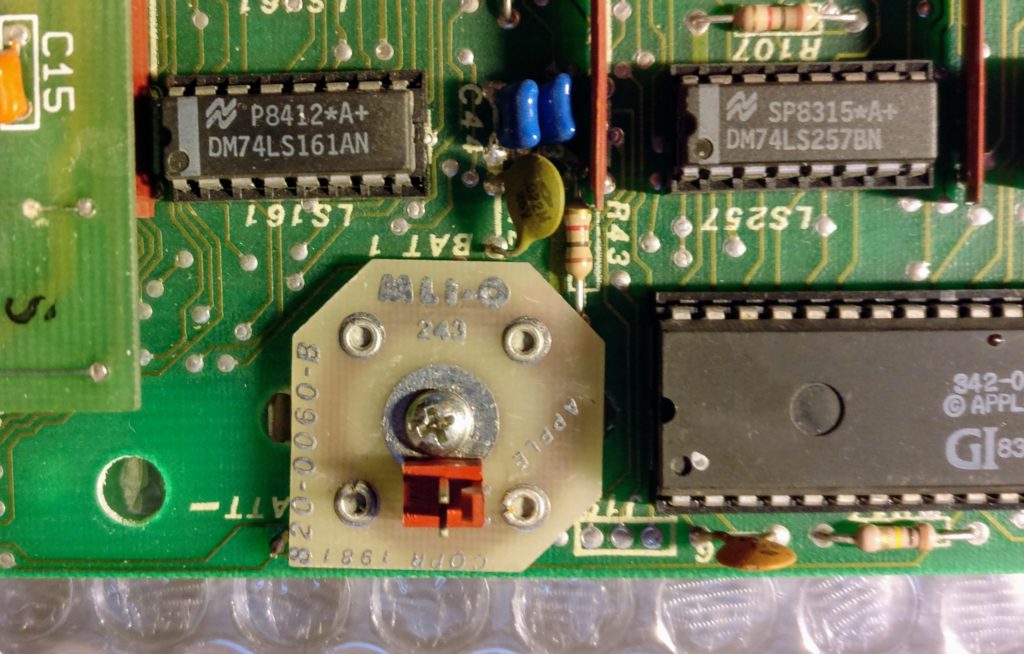
– Install the battery adapter using the clamp and a screw (mind the orientation) – thru the board in the socket hole reserved for it at G14 (See: Figure L and board diagram)
– Install the chip to location B3
– Install the wiring thru the hole in metal casing close to speaker.
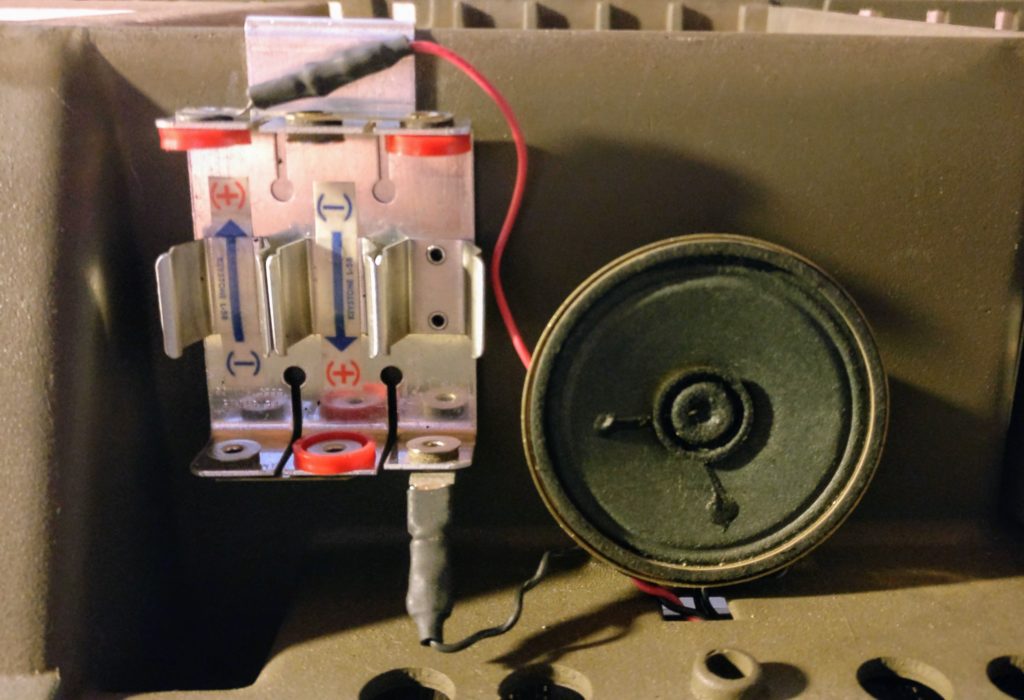
– Attach the wiring to the battery holder: red wire in top and black in bottom (see picture).
– Install the battery holder next to the speaker.
– Install 3x AA sized batteries and mind the polarity (red = positive, black = negative).
Table of Contents